Post by M is for Morphine on Oct 15, 2010 8:57:51 GMT -5
A couple of weeks ago a made a little pendant out of Super Sculpey, with the intent of making reproductions in plastic resin. There was some mild interest in the process, so I thought I'd make a thread to show you all what I did and what I learned.
Here is what I had to start with:
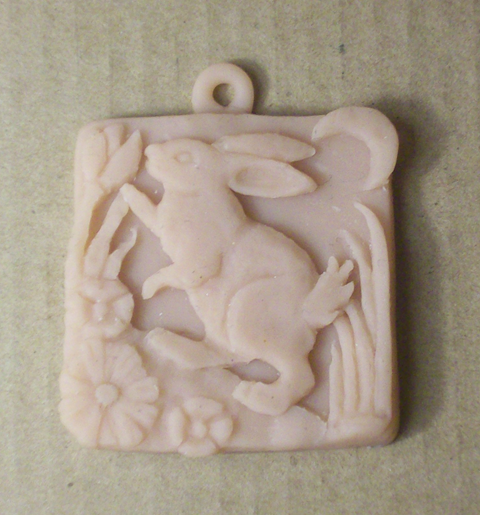
I broke the sweet bajeezus out of it shortly after that picture. DX I super-glued it back together, and got to work!
The first thing to do was to make a latex mold. I put the sculpt on a flat, smooth surface (in this case, a plastic chinese food container). I used liquid latex, which you can find at most craft stores. Blick's had it, so did A. C. Moore, as well as a few local businesses.
Some important notes about latex[/i]
Latex smells. Just so you know. It contains ammonia, so don't clean it up with anything containing bleach. Work in a well ventilated room. Some people are allergic to latex, so you should probably wear gloves.
Open up your latex and let it breath for a few minutes. If you let some of the fumes out, there will be less bubbles.
To get started, I applied a thin layer of latex to my sculpt, and to the surface it was on. You can use a paintbrush, but this stuff doesn't like to come out. I used some q-tips instead. You want about an inch of room around your project, maybe a little more. For the first coat, put it on as thin as you can. When that's done, blow on any bubbles, pop them with a needle, etc. You need to let this coat dry before you put on the next one. A hairdryer helps speed this up a lot.
Here is a wet coat, it's sort of thick.
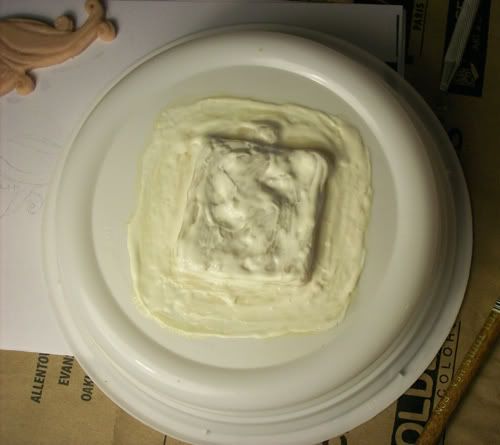
It was a later coat. You want the first couple of applications to be very thin, but you can let them be a bit thicker later. Don't slop it on: if you have really thick patches, they won't dry all the way and you can ruin the mold.
Here is a dry coat.
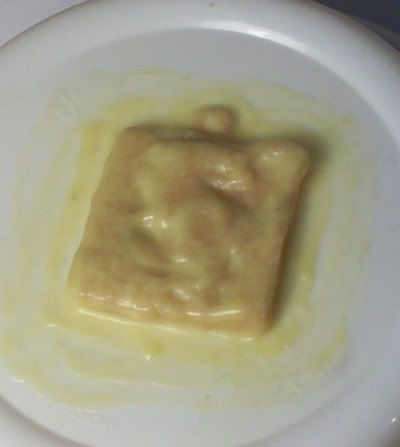
You want to keep building it up, coat after coat, until it is thick and strong. Let it dry completely between coats, but don't let it sit for over 12 hours between rounds. How thick is thick enough? The amount that I've heard is at least 20 coats. Mine ended up around 1/8th of an inch thick. It seems very strong and stretchy.
When you are happy with it, it's time to make a mother mold. This is a sturdy frame that helps the mold keeps it's shape. You can use a lot of things to make this. I went with good ol' Plaster of Paris. You can buy this at any hardware store, and it's cheaper there than at the craft places.
You'll need a mold release, so the plaster doesn't stick to the latex. You can make your own at this point. Mix some dish soap with water, and brush a little on your mold. Let it dry. The mold is now really shiny! Do it again another time or two just to be sure.
Coat the back of your mold in the plaster. Make sure the top is flat, so it has a nice surface to rest on when you're using the mold.
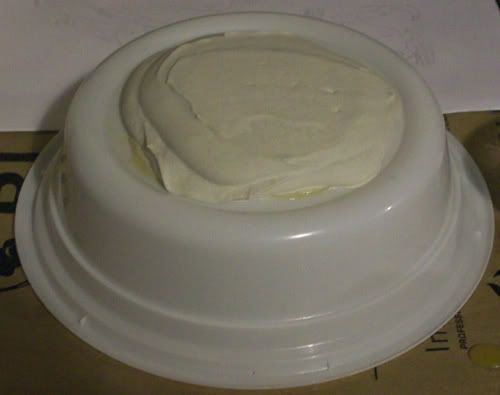
Let it dry for a day. Now it's time to see what you've got! Peel the mother mold off of the latex, and the latex off of your work surface. You can now pop the sculpt out of the latex, and admire your work.
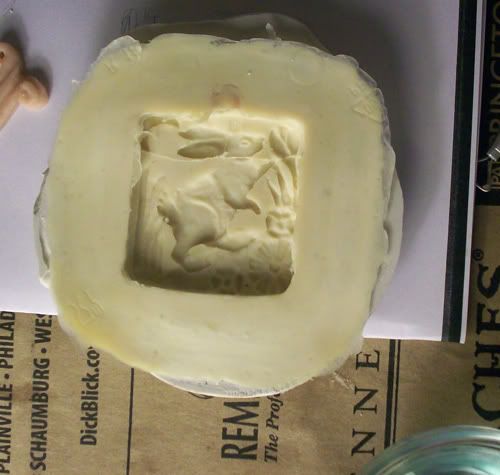
You might want to rub some talc inside of your mold so it doesn't stick to itself.
The latex picks up every detail. Even the cracks from where I broke it. >.< I scraped most of the crack lines off of the mold after this picture. Hopefully it will not affect the end result very much.
In conclusion, I found latex to be pretty pleasant to work with. It is very time consuming, though. The whole process took me about 3 days. Most of that was doing other things while waiting for stuff to dry, though. I hope that you all have learned a lot. I know I did!
Hopefully in the future I can add information about using resin, and also making a two part mold. My next couple are still going to be one part.
Here is what I had to start with:

I broke the sweet bajeezus out of it shortly after that picture. DX I super-glued it back together, and got to work!
The first thing to do was to make a latex mold. I put the sculpt on a flat, smooth surface (in this case, a plastic chinese food container). I used liquid latex, which you can find at most craft stores. Blick's had it, so did A. C. Moore, as well as a few local businesses.
Some important notes about latex[/i]
Latex smells. Just so you know. It contains ammonia, so don't clean it up with anything containing bleach. Work in a well ventilated room. Some people are allergic to latex, so you should probably wear gloves.
Open up your latex and let it breath for a few minutes. If you let some of the fumes out, there will be less bubbles.
To get started, I applied a thin layer of latex to my sculpt, and to the surface it was on. You can use a paintbrush, but this stuff doesn't like to come out. I used some q-tips instead. You want about an inch of room around your project, maybe a little more. For the first coat, put it on as thin as you can. When that's done, blow on any bubbles, pop them with a needle, etc. You need to let this coat dry before you put on the next one. A hairdryer helps speed this up a lot.
Here is a wet coat, it's sort of thick.

It was a later coat. You want the first couple of applications to be very thin, but you can let them be a bit thicker later. Don't slop it on: if you have really thick patches, they won't dry all the way and you can ruin the mold.
Here is a dry coat.

You want to keep building it up, coat after coat, until it is thick and strong. Let it dry completely between coats, but don't let it sit for over 12 hours between rounds. How thick is thick enough? The amount that I've heard is at least 20 coats. Mine ended up around 1/8th of an inch thick. It seems very strong and stretchy.
When you are happy with it, it's time to make a mother mold. This is a sturdy frame that helps the mold keeps it's shape. You can use a lot of things to make this. I went with good ol' Plaster of Paris. You can buy this at any hardware store, and it's cheaper there than at the craft places.

You'll need a mold release, so the plaster doesn't stick to the latex. You can make your own at this point. Mix some dish soap with water, and brush a little on your mold. Let it dry. The mold is now really shiny! Do it again another time or two just to be sure.
Coat the back of your mold in the plaster. Make sure the top is flat, so it has a nice surface to rest on when you're using the mold.

Let it dry for a day. Now it's time to see what you've got! Peel the mother mold off of the latex, and the latex off of your work surface. You can now pop the sculpt out of the latex, and admire your work.

You might want to rub some talc inside of your mold so it doesn't stick to itself.
The latex picks up every detail. Even the cracks from where I broke it. >.< I scraped most of the crack lines off of the mold after this picture. Hopefully it will not affect the end result very much.
In conclusion, I found latex to be pretty pleasant to work with. It is very time consuming, though. The whole process took me about 3 days. Most of that was doing other things while waiting for stuff to dry, though. I hope that you all have learned a lot. I know I did!
Hopefully in the future I can add information about using resin, and also making a two part mold. My next couple are still going to be one part.


